I started to work on this project with no expectations. I didn’t think about what I would make and where I would put it in my home. I just wanted to learn and explore.
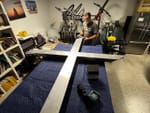
On recommendation from a friend, I joined the Brisbane Institute of Art and enrolled in the “Sculpture 1” semester course.
With a small group of people we started exploring sculpture.
Our instructor and sculptor, Karl de Waal, outlined our course and highlighted the mediums we will be using during the semester. The instructions for the first medium was clay, we had to take a 2D image and make a 3D version of it. The second medium was Hebel (aerated cement blocks). The third medium was “found objects”.
Fossilised death assemblage

Over the course of a few weeks, deliberating what to make, I settled on the idea of recreating a death assemblage that I saw when looking at pictures of dinosaurs and fossils with my son. Karl taught me how to make molds of little fish for creating repetitious patterns of fish to create a scene of multiple fish.
While getting inspiration for the fish I naturally also stumbled across fossilised predatory fish. During this stage, I read an article about birds dying on a remote island off the coast of China, where the contents of their stomachs were full of plastic and other foreign objects by Chris Jordan.

This gave me the idea of creating a fossilised “death assemblage” inside a predatory fish’ stomach with a subtle twist by adding the fish hooks to the little fish, something that didn’t belong in the fish and its era.

I made a set of moulds for the head and fins and then made a full size negative of the sculpture. I then cast plaster to create the positive.


Once I completed the plaster cast predator, I coated it and left it until closer to the end of the course to apply a specific coloured tint to it. The tint used was bitumen, it was applied and wiped off to create a realistic “fossilised” look.
Geometric predator

Before starting the next medium, Hebel, I thought about what I was going to do and whether I should create a themed set across the 3 mediums. Karl and I discussed various options with Hebel, by cutting a standard Hebel block in half I realised I could achieve the exact length as the plaster fish if I joined the 2 half blocks lengthwise. At this point the decision was made that I will be making 3 fish that fit into a 1200 x 400 framed background.

Karl and I talked about the Hebel fish and I mentioned that I could used the serrated edge of the used saws to place a row of teeth for the Hebel fish, but that meant the stomach contents theme would not be followed. This then sparked the whole idea of making a complete fish out of blades. Instead of going for the traditional soft curved Hebel sculptures, I decided to try and make a geometric shape fish with straight lines and hard edges.
I wasn’t sure if I would be able to achieve this look successfully, but I just persisted and got it done. The porous surface was filled and sanded before being spray-painted white. This was my first attempt at using Hebel and spray-painting, all I can say is I have a lot still to learn.

The idea I had for the stomach contents of this fish was to be real aquarium fish sealed in formaldehyde. Access to the chemical proved to be too difficult and instead I used two fishing lures.

The background used was 4mm thick “mill finish” aluminium sheet.
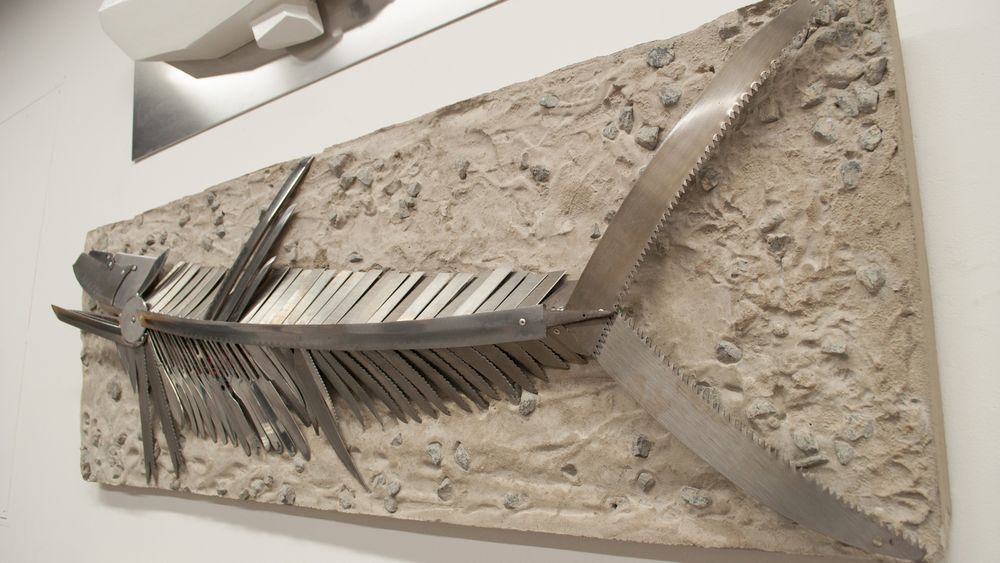
Fish of blades

The last fish in the set was going to be made completely out of blades. I started thinking of the shapes required and found that the shapes in knives are perfect for recreating various parts of a fish. I started buying used knives from second hand shops and online classified websites.

With the shape of the plaster fish in mind, I found that a samurai sword was the perfect shape to give the fish its natural curve as a finishing touch. The head and other parts were made from a kitchen knife block set where I used 9 steak knives on the bottom half and 2 bread knives for the front fins.

The top part of the fish comprised of 29 utility knife blades. Other smaller items finished the fish off like the pizza cutter for a gill and the saw blades for the rear fin. I used a total of 80 blades, mainly second hand knives and samurai swords. There were only 2 new blades and the utility knife blades were new.
On recommendation from Karl I did not use any glue, welding or soldering. Every knife was drilled with a carbide drill bit and pop riveted into place. I needed a background and I just thought to myself a cement background at the exact 1200mm x 400mm size will be easily accomplished. This was the ideal medium to serve as a background for the stainless steel knives.

The stomach contents of this predator are small plastic soy sauce sushi fish bottles. This served as a link to the blades theme of the predator and follows the theme across the three fish.

It was a race against time for Karl and I to mount the sculptures. I had three mountings made to ensure they are supported to provide visitors with the opportunity to view them safely.

When I completed all three sculptures in time for the exhibition, I felt that everything about this project somehow just fell into place. The sizes, the shapes, the colours.


